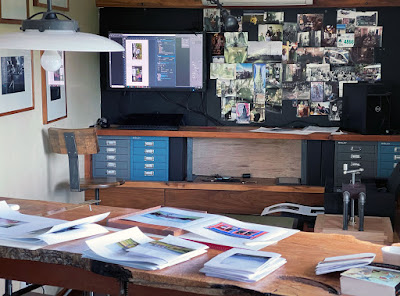
Saturday, June 26, 2021

Bookbinding resumed

One would have thought that the pandemic would be a great time to make more books and develop skills. Foe a while it was. In the Summer, I made one for DW as a retirement gift, hoping to partly make up for not being around her colleagues/friends and students and for having only a small group of her friends for a outdoors retirement party. It was my sophomore effort with quarter binding using leather and hardwood veneers. There's always room for improvement, but I was greatly honored by DW's appreciation of it. 


After that effort, I upgraded to the Epson P900 as being able to swap between matte and glossy inks without the ink waste penalty was an upgrade most Epson users had long been waiting for. Few things in the digital darkroom are as infuriating as realizing you were getting screwed when the printer informed- wait while ink is being changed (and getting flushed to the waste tank).  However, Imageprint after the reps noting its imminent availability starting 3rd Q 2020 was not available for the P900 until this spring.  I wasn't printing any new books until the software was available as I found the layout and color correction options essential in the making of the sheets into book signatures. 
Thus more than a year transpired between book projects. In the interval I had started looking in on a couple of Facebook bookbinding groups after finding the Reddit bookbings sub initially helpful but not very interactive and more focused on styles I'm not interested in. I continued to look for on-line groups and literature with a focus on hand made photobooks. 
At this point, I'm still a bookbinding newbie with less than a year of experience and with more books on the topic than books made. 


Keeping in mind fellow newbies in the Facebook group and in the Leica Forum photobook topic, here are the jigs I've made for bookbinding

I picked our Ireland trip I did not print many of the photos taken at that time and many could be improved on using 2020 printer/software technology as opposed to 2005. Another reason for waiting for the Imageprint RIP was that it would make printing a large number of small prints on panorama sized paper much faster and easier. 

The next part was trying to remember the sequence/location of where the photos were taken, as Ger and I were often doing activities in separate groups as it was a bicycling tour. 
Also, I was using a film camera and label my slides and negatives minimally and my metadata was year and country. DW was using a Nikon D70, however. So the metadata from those files filled in our hazy 15 year old recollections. 
The next step was to organize 110 3x5's into a book dummy.
Oddly enough, the book dummy with its less than elegant name and, in the form I've made them, belie its importance in the bookmaking process.  In this case took more time to put together than the book case. 
The next step is printing the pages of the book. At this point I'm relying on Imageprint for the proofing and layout.  This is what  looks like.
Another book making jig specific for my purposes is this scoring guide. Photo paper being thick and coated on both sides is difficult to score. This guide allows the bone folder to score the paper sufficiently deep to be able to cleanly and accurately fold it. 
I use the sewing frame and cradle pictured above to make the book block much like everyone else so I did not take photos of the process. The lying press is used to apply the glue to the spine and for rounding the spine if I'm doing that step. I'm not devoting any space to that aspect as it's straight forward and this post is long enough as it is. One aspect of making the book block that seems to be a challenge for newbies is trimming the text block to produce a smooth, even edge on the head, tail and foreedge of the block. No guillotine or plough, no problem if you're a woodworker. A Moxon vise and a quality carpenters square together with a plywood square with a support base to hold the case square provide the support and alignment for an accurate cut. A paring chisel's long blade together with thick front jaw make it easy to produce a smooth and square cut.
I won't go into details on constructing the block cover. A lesson learned from past efforts is the importance of the endpapers. I used papers not specifically made for that purpose with suboptimal results. This time I ordered papers made for that purpose with improved results. I'm still having difficulty reliably printing the spine title so that it's square with the leather covering and came close to an expensive mistake. If I'm going to any front and back lettering, I'll likely have to learn Bradel binding. For now, I've made another book and some more of our photos are out of the hard drives.
InDesign is another thing I'll have to learn but that's not going to happen any time soon, In parting, here's a reference as to what can be involved. Bear in mind, it does not cover printing or making the book itself. And for that price it's online!


Saturday, January 9, 2021

Pencil and Pen Box

This belongs to the- feel like doing something in the shop but don't want to start a major project- category. Thanks to the mechanical pencil misadventure which was the subject of the prior post, I now had a fun DIY pencil sharpener and a bunch of sharpened pencils that needed a container. Yeah, I could use a coffee can or glass, but what's the fun in that. Also, thanks to the pandemic (reading more), I've taken a renewed interest in fountain pens- they work better for me with marginalia and underlining. I also wanted a lid so the pencils could be transported from house to shop w/o breaking the points.

I started with plywood remnants and other materials I had in the shop. The box was originally intended as mockup to get an idea of box and compartments. Thus the use of 21G brads visible on the sides and cover.

 Also, why the bottom is less than elegantly finished. 


About  a third of the way through the project, it became apparent that trying to make a box without any visible brad heads was overkill for the purpose of a fun several hour project. Also, it's not going to be for storing any "luxury writing instruments" - my experience with Modern Fuel's product cured me of that. BTW, I returned their defective product more than two weeks ago and have not received a credit. 

The Moxon vise on my work desk makes a good parking place when I'm not using the vise for bookbinding.

That said, this little box was fun to make, does its function well and is satisfying to use and look at. Bonus is having a home for our tablet styluses.