Saturday, April 22, 2017

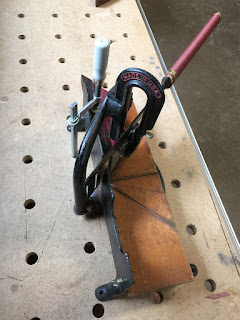
La Forge Populaire Miter Jack


I first came across the La Forge Royale miter box when looking through the Benchcrafted  blog in preparation for building my workbench. It was an elegant device that was filed away in my mental future project list.
Image result for miter jack
My interest in this appliance resurfaced when researching ways to make small picture frames without holding small hardwood pieces with one hand  between the sliding saw fence and  the sawblade set at 45 degrees. A miter box was one solution. A Stanley 150  model in good shape and a fair price was bought on eBay and could be used with a Japanese saw ( I stayed away from boxes using Western saws).
After modifying to accept a Japanese saw, it worked but required trimming to achieve a precise 45 degree edge. I sent the box off to my machinist cousin who would work on it between his larger orders. It's been 2 months since I sent it, but given his kind offer to do it for fun, I have not bugged him about it; maybe I'll call him this weekend.
It also seemed when reading about their use that most miter boxes produced results that require additional trimming. A dedicated miter trimmer was an offered solution in these articles but seemed  too limited in use to make sense in my shop. In the mean while a Jointmaker SW came up on eBay and for once the bidding on it was not out of control. While with depths less than one inch, it was dead square, when working with thicker pieces there was a slight drift. This got me to thinking about a miter jack again.
They tell me if you can see the line you can cut to the line. That doesn't apply in my case at least when I comes to chiseling across lines interrupted by pins and tails. It became an OCD objective when it became clear that as a dovetail novice, I could use help with that task. Given that deficiency, I would have more use for the 90 degree surface than for the 45 degree face.
An  initial obstacle was the wood screw mechanism. At the time I was preparing to start building the jack, Benchcrafted sold the metal parts for connecting the screw to the movable part of the vise.
Image result for miter jack vise
I was on my own, however, with regards to the wood screw and nut.

I had no interest in learning to make wood screws and nuts or acquiring the hardware needed to make these. Metal screws were used in other DIY variations but these seemed to have either a limited travel range or appear excessively large for the task.

Then I had an Eureka moment where it dawned on me that the solution was quite possibly on my benchtop already- a Veritas quick-release wonder dog.

I began the build 2 weekends ago. DW wanted something to cover a clawed up sofa, but as mentioned above, the miter jack had become an "obscure object of compulsion" to paraphrase the title of an old Spanish movie. I used the Benchcrafted directions for the most part except for a few changes; hence the "populaire" name change.
Instead of  2 inch thick quartersawn maple I glued together 4/4 planks with the rings in alternating direction. Resulted in a little thicker base. I also had the base extend past the fixed jaw for an additional clamping area when held perpendicular.
Instead of a solid block to form the vise jaws with the angle cut with a band saw, I serially ran 8/4 boards through my table saw at a 45 degree blade tilt, then used dominos to maintain position while gluing.
Much to my dismay, the last 45 degree cut exposed the dominos.

Which is why the purpleheart rectangles are on the upper part of the jaws along with the medial aspect of the jaws featuring  a purpleheart insert running along the middle.
The most difficult part of the project was achieving  true 45 and 90 degree faces on the jaws. I needed four tries to achieve the final result. Even with use of the table saw for the 45 degree cut, there was a lot of  maple end grain hand planing. Painful but necessary as that reference surface is (to keep the French thing going) the raison d'etre for the Jack.
Any possible use for the 22.5 degree insert the Royale featured was not worth the extra effort on my part to make it. If it does turn out to be sufficiently useful, I can add it later on. Thanks to the pattern maker vise and Veritas surface clamps, I can hold the Populaire in a 90 or 45 degree orientation without resorting to making the accessory base
Image result for miter jack
As it turns out, Lake Erie is making a run of the wooden screws and nuts used in the Benchcrafted build. The Royale is prettier and more free-standing than my Populaire, but its $200 saved and I didn't have to wait for the anticipated June delivery. The quick release dog is easy enough to remove and replace if needed
Here is in standard position secured by bench dogs:
At a 45 degree angle:
And perpendicular held by surface clamps:
The next project is something along these lines to cover up and futher protect our poor couch against Andy's claws.
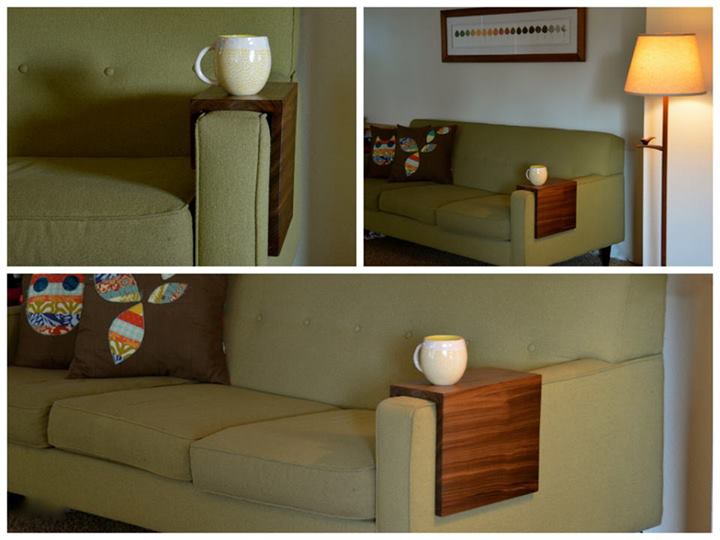
couch table
The above is courtesy of She Works Wood- the author is way up on the food chain both as blogger and wood worker.
Friday, April 14, 2017

Dovetails and Miters

In my sawdust producing evolution, two areas stood out as needing improvement. While eventually I could arrive at a satisfactory product, being able to reliably and consistently make frames with tight miters that required no further tweaking was an unmet goal. This is despite probably having made at least 60 frames over the years. Specifically, it would be difficult for me to produce 4 identical frames with precise miter joints. This was goal 1.
The other goal, much more ambitious and unlikely to be met for 2017, was to make precise dovetails. An obvious way to get there is by using router jigs. That route was unappealing as it would have that element of rote and uniformity that marks mass produced works even though that result in a perfect fit between the pins and tails.
With those objectives in mind, a frankenvise, a Jointmaker Single Wing purchase, a picture frame, a stand for said Jointmaker and a rookie dovetail project follows.
Frankenvise
Other than the condor tails I made for my workbench, I was a complete dovetail newbie.
Reading up on dovetails, it seemed a Moxon vise would be a handy bench accessory. While in researching workbench vises, I had decided on a pattern makers vise, but also figured a wooden screw vise should be part of my arsenal. The Lake Erie version combined with my vise had the potential of being capable of holding large items in my mind's eye as well as serving as a Moxon vise. At that time LE Toolworks had a sale, so around Thanksgiving I ordered the screw and an extended wood vise nut. Lee Valley during that time also was offering free shipping so their 3/4" bench anchors would be a great way to secure the proposed frankenvise to the bench.

Once it proved to be a viable device, it seemed too useful a jig to only be used on the frankenbench.
Once seeing that bench anchors were also available for 20mm diameter holes, remembering designs which used pipe clamps for Moxon/dovetail vises led to two easy alterations which allowed the appliance to be used on my countertop area

and also on a MFT top.

In it's pipe clamp configuration it can also be used as a double vise at the end of the frankenbench.

Thus far, it's mostly used in combination with the pattern makers vise. This combination allows for a bench height tolerable for the hand plane work encountered while working on dovetails while being able to saw and chisel at working distances easy on old eyes and back.
Jointmaker Single Wing
While unwilling to go the router based dovetail jig route, I'm not averse to getting mechanized help where I can find it. Enter Bridge City Tools. I visited their showroom last fall and quickly became a fan after using the company's Japanese saws (by dumb luck he had an adjustable back saw in stock that was perfect for cutting the condor tails on my workbench. John Economaki  gave me a brief primer on dovetails in general along with assigning an afternoon of practice. Hate to admit, I did not complete the latter assignment. Went ahead with condor tails after two practice runs with predictably rookie but acceptable results. While there, though, I also had a look at his Jointmaker Pro table saw- a neat machine but 1) unaffordable and 2) not in stock. But as I had caught the BCT bug I kept looking at eBay for more Japanese hand saws. While I could only buy one more hand saw- one of my favorite tools, has an incredibly thin kerf and high tooth count, I was able to hunt down a single wing Jointmaker. Fortunately as well, it was one BCT item that actually sold for 70% of the original price and nearly 1/2 off the JMP model- it's not uncommon for BCT to sell for a significantly and at times ridiculously higher amount than the original price. I received it in new in box, unassembled and in original packaging condition. When I commented on this to BCT staff they noted that this version had not sold well. I replied that, for one thing, it would be difficult for a right handed person to use smoothly, but works like a charm for a leftie. His manager noted that John E is left handed.
Anyway, once assembled, I used it to replace a poster frame that had been one of my first efforts. Here are the miters from that frame
It was a case of beginner's luck as the replacement frame using the Jointmaker required no further tweaking of the miters.

However, attempts at deeper cuts revealed a tendency of the blade to deviate from perpendicular for cuts higher than 1 inch. I  tried multiple adjustments, including making a dedicated stand for the table before putting up the white flag and calling John E for help. He noted that my problem most of the time was due to the work piece  not being properly secure. The fences supplied with the table/miter saw are not really designed for securing tall or thick workpieces. BCT's literature cheerfully notes that most users will make fences specific to their needs. Here is my design.

In the mean while, I was happy to find that BCT was going to produce the table and a much more precise and elegant (with a price to match) fence. Like all BCT products- good things come to those who wait, so in the meawhile, I'll make do with my DIY fence.
Jointmaker Stand.
A stand was also on eBay but I passed as it seemed kinda flimsy and expensive.  Once I had some experience using the machine the desirability of having a dedicated base became clear. It would help in minimizing any blade deviation due to saw movement. Also, optimal use was on a base lower than normal workbench height. While I could lower my workbench to an ergonomic height for the Jointmaker, that made the workbench too low for other dovetail making tasks. I resisted making a dedicated base given my tendency towards sparseness, but it's a small footprint, easy to move and doesn't interfere with any other tasks.

I'm hoping also that a new thicker blade that is in production will also help with the drift problem. To keep things in perspective it's only a slight deviation, but because it's slight, cleaning up the miters along with making less than 1/16" changes in length, made me realize the usefulness of a shooting board.
Which leads to the next project- a variation on a Benchcrafted project, the La Forge Miter Jack ... but that's another story.
C. Schwarz prescribed a dovetail a day to become a better dovetailer. I started that assignment after assembling the Jointmaker. Then realized that I had better sharpen my chisels as I was crushing instead of slicing. So there was a "lost weekend" spent on chisels and plane blades, which is what happens when more than a year had transpired since the last time that chore was done.  While initially intended solely for practice, part of the process was to mark them as carefully as possible to achieve sequential part alignment and as an attempt at making a box. Also, practice in context of a project works better for me.  I did chop off the first two attempts and started over. It was a pleasure to find that dovetails resulted in  three sides matching up and being square. This allowed for the fourth side to be cut with tails on on both ends fit on top with the whole thing square. While not exactly heirloom grade, I was pretty happy with the result. At the top of the list in readily identifiable areas for improvement are better marking lines and paring to the line with chisels. But focusing on the positive, DW thought I should turn it into a keepsake piece. Which brings us to Ernie's urn.
The 2016 Holiday season was a somber time for us as we had lost our 12 year old cat in the summer and out 18 year old cat in December. Ernie had been with us since DW's sister gave him to us as a kitten shortly before our wedding. He was and still is a part of our lives. Ernie's ashes returned in a nice little urn but he deserved more. It had been my intention that my first dovetail project be his urn and  that it features my first viable dovetails adds to it's value.

To anyone else, it's an OK box, for us it's a labor of love. The top is a photo of a blackboard chalk drawing DW did many years ago of Ernie. It was printed directly on a sheet of maple veneer and glued to the top cover . We'll keep the urn in our music/library room as that was his favorite spot.